I meant to post this tutorial yesterday, but I got hit with a terrible migraine, and 2 Excedrin and 2 hours later it was still there. The pictures for the tutorial are not the greatest, but I will describe it the best I can :) If you're confused, leave a comment or email.
1. First make a lose slip knot on the left side. You will need the open sid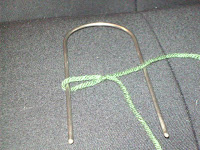 e to be at the bottom, that way you will be able to make the strip longer than your loom.
2. Take your string and wrap it over and behind the right side of the loom.
3. Put your hook through the loop and yarn over. Pull the string through the loop.


4. Yarn over through the loom, taking a loop through the back, and pull it through the loop. It should look like this:
5. Okay, t his is where it may get a little confusing. Lift up your hook, like in the picture with the hook part going first, and the other end following. So, the should now be upside-down and the loop that was on the hook should be on the back side, facing away from you. Think of it as you are making an arch with your hook over the work that you've already done (the yarn that's on the loom already).
6. Holding the left part of your loom, flip the right part over the left part. The original right part of the loom is now the left part of the loom, and the same with the original right part. (I was not able to take a picture of this for obvious reasons) Turn your hook right-side up (it should have been facing down when you turned it from when you made your arch). By doing this you cause the string to have wrapped from the front of the loom to the back of the loom, similar to what you did in the second step.
7. M aking sure that you are holding the "tail" to keep the loop straight, insert the hook through the loop on the left side. Yarn over and pull through loop again. You should now have 2 loops on your hook. Yarn over once more and pull through both loops.....sounds like a single crochet, huh? It is :)
8. Repeat procedure from step five through step seven (so you would start by making an arch with your hook over your work).
You will only do steps 1-4 when you first start the strip of hairpin lace. Make it as long as you want or need for whatever you're working with. I have heard that there are several ways to join the strips, most of which I don't understand because the tutorials I looked over were difficult to understand. I just line up the strips one next to the other and single crochet the long loops it makes.
I have one more small thing I worked on today. I got purple beads earlier this week and could not wait to do something with them! So I made earrings....so pretty :) These pictures don't do the beads justice.
PS: Ignore the badly chipped nail polish :)
1. First make a lose slip knot on the left side. You will need the open sid
 e to be at the bottom, that way you will be able to make the strip longer than your loom.
2. Take your string and wrap it over and behind the right side of the loom.

3. Put your hook through the loop and yarn over. Pull the string through the loop.


4. Yarn
 over through the loom, taking a loop through the back, and pull it through the loop. It should look like this:
5. Okay, t
 his is where it may get a little confusing. Lift up your hook, like in the picture with the hook part going first, and the other end following. So, the should now be upside-down and the loop that was on the hook should be on the back side, facing away from you. Think of it as you are making an arch with your hook over the work that you've already done (the yarn that's on the loom already).
6. Holding the left part of your loom, flip the right part over the left part. The original right part
 of the loom is now the left part of the loom, and the same with the original right part. (I was not able to take a picture of this for obvious reasons) Turn your hook right-side up (it should have been facing down when you turned it from when you made your arch). By doing this you cause the string to have wrapped from the front of the loom to the back of the loom, similar to what you did in the second step.
7. M
 aking sure that you are holding the "tail" to keep the loop straight, insert the hook through the loop on the left side. Yarn over and pull through loop again. You should now have 2 loops on your hook. Yarn over once more and pull through both loops.....sounds like a single crochet, huh? It is :)
8. Repeat procedure from step five through step seven (so you would start by making an arch with your hook over your work).
You will only do steps 1-4 when you first start the strip of hairpin lace. Make it as long as you want or need for whatever you're working with. I have heard that there are several ways to join the strips, most of which I don't understand because the tutorials I looked over were difficult to understand. I just line up the strips one next to the other and single crochet the long loops it makes.
I have one more small thing I worked on today. I got purple beads earlier this week
 and could not wait to do something with them! So I made earrings....so pretty :) These pictures don't do the beads justice.
PS: Ignore the badly chipped nail polish :)
Comments
Post a Comment