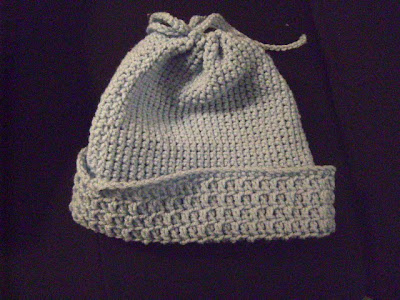
 I just finished this hat this morning. I got the pattern off of http://aprildraven.blogspot.com/. I recently fell in love with this blog....really easy patterns and very cute things. This is the convertible hat from this website (I love convertible clothing...so versatile!). I decided not to add beads, and it is only one color. It took a little more than half a skein of yarn to make. It's actually a really pretty sky blue, the picture doesn't do it justice.

Here is a scarf/shawl that I finished earlier this week. I've never made anything like this before, because I always associated shawl with old lady. But April's scarf was so cute that I had to try it. I think it turned out really well, and it's warm. I'm not sure about the color, but I think it's growing on me. This is also versitile as a scarf, or as just a shawl. You could also wear it as sleeves by putting it over your shoulders and taking the ends and tie them behind your back, underneath the back of the shawl.
Halloween! I haven't been doing a whole bunch of stuff for Halloween, sad to say, but I have a lot of ideas. I just need to go shopping (should be next week,that and I haven't gotten back to my sewing machine yet). I got this idea off of a shirt I saw on http://www.cutoutandkeep.net/. I used an off-white yarn and chained my heart out. Chaining is the foundation to crochet. I chained 5 lengths, all purposely uneven because nothing is perfect in nature. I laid them out so they criss-crossed and losely measured how long the final chaining length (the one that makes the spiral pattern) would need to be and made that. I wrapped yarn around the middle of the criss-crossed pieces then attached the end of the final chaining length to it. I used 3" pieces to attach the long piece to the shorter criss-crossed pieces with square knots. My final web is about 3' in diameter and it took less than half a skein. I later found a website on how to make a web without chaining and just using the yarn itself, however, I think it would be hard to store and would get tangled easily.
 I found a pattern for this eyeball door knob cover:
http://www.craftster.org/forum/index.php?topic=189436.0
Here is my first attempt at it. I like the idea, but I don't like the pattern for it. It is also difficult because are door knobs are really small. I think that I will attempt it again, but add a tie to put it on so it is adjustable and will fit over a number of door knobs.

Here's part of the costume that I made for last year. I picked up a man's black 2XT (T=Tall) at Goodwill. I used the pinch and pin method to make it fit me. Since it was "Tall" it was also definitely long enough. This is a good base for many costumes....I was a cop last year, add sunglasses, badge, and handcuffs. French maid, add apron, feather duster, and lacy hair accent (you could even be Magenta). I'm sure there are many more things you could be.
 This year, I'm going to be a dark angel. I originally was going to go with the "tattered" fallen angel type deal, but I wanted to make my own wings. I found a tutorial on Threadbanger.com (just search for "fairy wings") how to make fairy wings and I've been dying to try it out and I found my opportunity. Here is the skeleton to the wings. I still need to pick up some hosiery and feathers. Not sure what I'm going to do for the main costume, but that will probably be inspired from the wings.
Happy Crafting!
Comments
Post a Comment